
Table of Contents
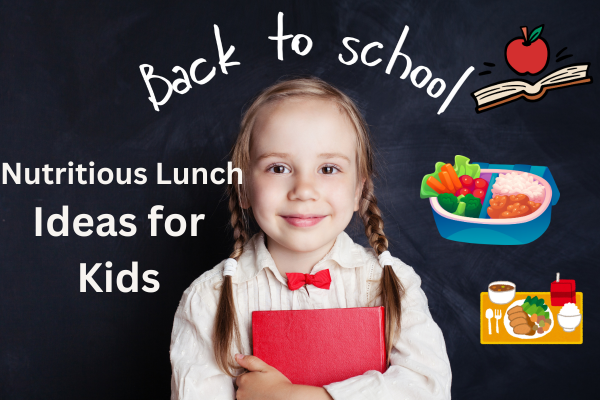
Introduction: Back to school Nutritious lunch ideas for kids
As parents rush to prepare lunches during the back-to-school season, the daily prep will be appealing and satisfying for the children. Lunch time can be much more fun if planned correctly and creatively. It not only fuels kids for that busy school day but also imparts healthy eating habits.. There are so many healthy lunch ideas available that come in a variety of tastes and diets to answer all needs, ensuring the kids do have the energy and are ready to learn. Colorful wraps, healthy grain bowls, creative snacks, and tasty treats make lunchtime fun as well as an overall well-being-giving experience. So let’s start nutritious lunch ideas for kids with some yummy and healthy ideas that have kids looking forward to opening their lunchboxes!
1. Colorful Wraps
Colorful wraps are so much fun, and healthy, as a lunch for kids. What is wonderful about colorful wraps is that you’re mixing several ingredients together in the most delicious, looking beautiful meal. They can be versatile, easy to prepare, and adaptable to individual tastes, which makes them the perfect solution for back-to-school lunches. Here’s the recipe on how to make wonderful and healthy colorful wraps:
Ingredients:
- Wrap Base: You can have either whole grain tortillas or spinach tortillas; for low-carb, use large lettuce leaves.
- Protein: Sliced turkey, chicken, hummus, tuna salad, or black bean spread are great options.
- Vegetables: Fresh veggies for texture and color. Try:
- Fresh spinach or mixed greens
- Bell peppers-red/yellow/green
- Cucumbers
- Shredded carrots
- Avocado slices
- Cherry tomatoes
- Cheese (optional): Add richness and flavor with sliced cheese or shredded cheese.
- Sauce or Spread: Add the zest with spreads. Try:
- Avocado
- Cream cheese
- Hummus
- Mustard or mayo in moderation
Instructions
- Spread out the wrap: Begin with your chosen tortilla or lettuce leaf spread out on a clean surface.
- Add the base: Spread your hummus, cream cheese, or avocado evenly across the wrap, leaving an inch at the edges.
- Layer your fillings: Start by applying the protein, then your veggies and cheese. Be creative in how you arrange the fillings so that it looks good and contains colors.
- Roll it Up: From the edge of the wrap, start to roll the wrap up tight while tucking in the sides so that there is no leakage of the filling.
- Cut and Serve: After rolling it up, slice down the middle diagonally or into pinwheels for daintier bites. You can help hold it together with a toothpick if you need to.
Tips for Success
Involve Your Children: Having children help with assembling their wraps can encourage them to attempt some of the new ingredients and make them more proud of their meals.
Make Ahead: Prepare wraps in advance, store them in airtight containers to keep them fresh. Wraps can be prepared the night before and kept in the fridge.
Different Filling: Let creativity shine with mixed flavors and seasonal fresh vegetables. Use leftovers roasted vegetables or proteins from one of the previous meals to prepare lunch.
Lunchbox Match-ups: Pair wraps with a side of fresh fruit, yogurt, or crunchy vegetables and a small dip like ranch or hummus to round out the meal.
2. Healthy Grain Bowls
Healthy grain bowls are an ideal way to design a well-rounded, healthy lunch for kids. They are very flexible; they look great and easily filled with lots of flavors and textures. A grain bowl essentially contains a base of wholesome grains, a protein source, colorful vegetables, and scrumptious toppings. Here’s how to prepare the ultimate wholesome grain bowl for your child’s lunch.
Ingredients:
- Grain Base: Mix with various whole grains, such as
- Quinoa
- Brown rice
- Farro
- Barley
- Bulgur
- Protein: Include lean proteins for longer-acting energy, like:
- Grilled chicken or turkey
- Baked tofu or tempeh
- Canned beans, like black beans, chickpeas, or kidney beans
- Hard-boiled eggs
- Lentils
- Veggies: Add some color and nutrients with a rainbow of vegetables, such as
- Steamed broccoli or green beans
- Roasted sweet potatoes or butternut squash
- Cherry tomatoes
- Shredded carrots
- Cucumber slices
- Avocado
- Sauces and Dressings: A good sauce or dressing can be a nice addition to the bowl. Try:
- O-li-ve Oil and L-e-mon Juice Vinaigrette
- Tahini Sauce
- Soy sauce or teriyaki sauce
- Greek yogurt or ranch dressing
- Sprinkle with: Add a crunchy topping for texture and flavor, such as:
- Feta cheese or shredded cheese
- Seeds (pumpkin seeds, sunflower seeds, or sesame seeds)
- Nuts (sliced almonds or walnuts)
- Fresh herbs (parsley or cilantro)
Instructions
- Prepare the Grain Base: Cook your preferred grain according to package instructions. When finished, let cool slightly before you are ready to assemble the bowl.
- Pick Protein and Veggies: Choose your protein, then add a variety of available vegetables. This is also an excellent chance to add some fresh, roasted, and even pickled vegetables for an ideal mix of flavors.
- Step to prepare your lunch bowl is by adding the layer using cooked grain. Then add your protein and colorful vegetables, then section them off for a pleasant look.
- Drizzle with sauce: Pour across your favorite dressing or sauce on the top of the bowl.In this manner, everything will be lightly dressed with flavor.
- Topping: Sprinkle your favorite topping atop for crunch and flavor.
- Seal and store: If you’re going to pack them for lunch, seal that container tight so everything can stay fresh until lunchtime.
Success Tips:
Make-ahead tip: Assemble your grain bowls and store them in the refrigerator, even freeze them. They should keep for a few days, which is the beauty of this make-ahead meal prep–it works.
Mix and Match: Give children a chance to try new combinations by mixing different grains with proteins and vegetables.And seasonal produce lets you make meals fresh and exciting.
Warm or cold grain bowls are good for all seasons. When you need a warm lunch, try to use a thermos to keep the bowl heated.
Keep it Balanced: Try to make it balanced throughout with grains, protein, vegetables, and healthy fats.
3. DIY Lunchables
DIY Lunchables are a fun, creative way to serve kids a healthy lunch that they can customize to their liking while looking like the popular store-bought version. The great thing about this lunch idea is that you have control over the ingredients, so they can be healthier yet appealing to the palate of kids. This lunch idea encourages independence because children can mix and match their favorite items. Here’s how to assemble delicious and wholesome DIY Lunchables that kids will love.
Ingredients:
- Base Options:
- Whole grain crackers
- Sliced whole grain bread or pita bread cut into small squares or circles
- Rice cakes or mini bagels
- Protein Options:
- Sliced deli meats- turkey, chicken, or ham
- Cheese slices- cheddar, mozzarella, or pepper jack
- Hummus or nut butter for spreading
- Hard-boiled eggs or tuna salad in a small container
- Fruits:
- Fresh fruit slices- apple, pear, or orange
- Grapes or berries
- Dried fruits- raisins or apricots
- Vegetables:
- Baby carrots or celery sticks
- Cherry tomatoes or cucumber slices
- Bell pepper strips
- Fun Add-ins:
- A little indulgence, like a square of dark chocolate or a freshly baked cookie
- A small dip cup with ranch dressing or guacamole
Instructions:
- Choose the Base: Use your favorite crackers, bread, or rice cakes as the base for your Lunchables. Pack them in a compartmentalized lunch container or bento box.
- Add Proteins: Add sliced deli meats and cheese. You can let kids make their own combinations by stacking them together or using spreads such as hummus or nut butter.
- Add Fruits and Vegetables: Fill the container with a variety of fruits and vegetables. Mixing colors and textures will make lunch eye-appealing.
- Extras: Pack a small treat to perk up lunch. Kids love getting a little sweetness.
- Dips: Pack dips in small, airtight seal containers to prevent leakage and keep fresh.
- Seal and Store: Ensure that your container is airtight, so the food will stay fresh. For an added fun factor, use colorful containers or separators.
Tips for Success:
Engage Your Children: Having your kids help with preparing their own DIY Lunchables may encourage them to choose healthier foods and to be adventurous with different options.
Ingredient Mix-Up: Switch ingredients every week. Seasonal fruits and vegetables are a great way to mix things up.
Portion Control: Use the portion packs for dips and snacks, which would be sensible even if they don’t know what is in them.
Meal prep: Cutting up veggies and fruits, and even portioning dips, means assembling lunches will take less time in the morning chaos.
4. Fruity and Nutty Parfaits
Fruity and nutty parfaits are perfect, not only for school lunch but also as a delightful snack or breakfast. Layered treats present wonderful visuals, are very easy to prepare, and contain all the right nutrients. A combination of yogurt, fresh fruits, nuts, and granola, parfaits ensure an energy-packed meal that keeps kids going full-on during the day at school. Here’s how you can prepare those delectable fruity and nutty parfaits for your child’s lunch.
Ingredients:
- Yogurt Base:
- Plain Greek yogurt or flavored
- Plain Ordinary Yogurt-dairy or plant-based
- Fruits
- Fresh Berries (strawberries, blueberries, raspberries, blackberry)
- Sliced bananas or apples
- Peaches or mangoes-fresh or canned in juice
- Dried fruits (raisins, cranberries, or apricots)
- Nutty Additions
- Crushed nuts-almonds, walnuts, pecans, etc.
- Nut butter-peanut butter or almond butter to make creamy
- Crunchy Toppings
- Store-bought granola or do-it-yourself preparation
- Chia seeds or sunflower seeds
- Coconut Flakes-unsweetened
- Sweetener (optional):
- Honey or maple syrup for added sweetness (if using plain yogurt)
Instructions:
- Prepare the Ingredients: Wash and cut all the fruits as required. In case you’re using nuts, chop them smaller to help in layering and even eating.
- Select a Container : Choose a clear cup or a jar so that you can show off the layers in your parfait. It’s very appealing, especially for kids.
- Layer ingredients Start by placing a layer of yogurt at the bottom of your container. Then add layers of fruits, granola and chopped nuts. Keep repeating the process until you have filled your container, reserving the last layer of fruit and adding some nuts or granola.
- Add Sweetener (optional): If you are using plain yogurt and still crave a hint of sweetness, drizzle a few drops of honey or maple syrup between the layers or as an absolute topping.
Tips for Success:
- Make it a Family Activity: Engage your kids in making their parfaits by allowing them to choose some fruits and toppings they like best. Encourage them as they test different mixes.
- Use Seasonal Fruits: Use seasonal fruits when you would love fresh taste and quality, which could also keep the meal interesting all through the year.
- Pack the nuts and granola separately for crunch-freshness. Kids can mix all of them together right before eating.
- Try to give a good mix of protein-from yogurt and nuts- complex carbohydrate-from fruits and granola-and healthy fats from nuts or nut butter.
5. Vegetable Muffins
These veg muffins are a great way to get essential nutrients into a kid-friendly meal. These savory treats taste so delicious, yet they are full of vitamins and minerals; they make an excellent contribution to school lunches. They can be prepared in advance, can be kept easily, and they don’t need any refrigeration, making them a perfect choice for busy mornings. Here’s how to make healthy veg muffins that kids love.
Ingredients:
- Basic Dry Ingredients:
- 1 ½ cups whole wheat flour
- 1 cup rolled oats
- 1 tbsp baking powder
- 1/2 teaspoon baking soda
- 1/2 teaspoon salt
- 1 tsp garlic powder (optional)
- Liquid Ingredients:
- 1 cup milk (dairy or plant-based)
- 2 large eggs
- 1/4 cup olive oil or melted coconut oil
- 1 teaspoon honey or maple syrup (optional)
- Additional Vegetables:
- 1 cup grated zucchini, squeezed dry
- 1 cup grated carrots
- 1/2 cup finely chopped bell peppers of any color
- 1/2 cup corn, fresh or frozen
- ½ cup chopped spinach or kale (fresh or frozen, squeezed dry)
- Cheese (optional):
- ½ cup shredded cheese (cheddar or mozzarella)
Instructions:
- Preheat the Oven: Preheat your oven to 350°F (175°C) and grease a muffin tin or line it with paper liners.
- In a large bowl, sift together whole wheat flour, rolled oats, baking powder, baking soda, salt, and garlic powder. Stir until very well mixed.
- Wet ingredients: Put milk, eggs, olive oil, and honey or maple syrup together in another bowl. Mix until it is pretty smooth.
- Liquid and Dry Mixtures: Pour wet ingredients into dry ones and mix just until just combined. Be very careful not to overmix; that can contribute to dense muffins.
- Add Veggies and Cheese: Gently fold in the grated zucchini, carrots, bell peppers, corn, spinach or kale and, if using, cheese, into the batter to avoid overmixing, which will distribute the veggies evenly throughout the batter.
- Fill your muffin tin: Spoon the batter into your prepared muffin tin and fill each cup about ¾ full.
- Bake: Bake in your preheated oven for 18-20 minutes or until the muffins are golden brown and a toothpick inserted into the center comes out clean.
- Cool and Store: Cool muffins in pan for a few minutes, then transfer them to a wire rack to cool completely. Store in an airtight container in the refrigerator for up to one week or freeze for extended storage.
Tips for Success
- Veggie Experiment: Go ahead, experiment with the veggies you want. You can also use finely chopped broccoli, mushrooms, or even sweet potatoes. Just dice them to minimize their wateriness.
- Family Members Involvement: Involve the kids in helping mix the batter or choosing what veggies they prefer. The novelty of eating healthy will then dawn on them.
- Muffin Service: Serve the muffins along with yogurt or a small “dip” such as hummus or tzatziki. It creates a very tempting and nutritious combination.
- Lunch box combinations: Vegetable muffins, fresh fruit, and crunchy vegetables can make for a very healthy meal when sent in a lunch box.
6. Smoothie Packs
Ready to go smoothie packs can be a great source of quick fun, and healthy lunch ideas for kids, possibly boosting energy. Prepping the ingredients for smoothies beforehand will save much of your time getting up earlier on mornings, and still you’re working with your kid to get used to various fruits and vegetables. These could be arranged as per the preference of your child’s taste buds and health. Here is how to make quick, healthy, and effortless smoothie packs for your kid’s lunch.
Ingredients:
- Base Ingredients:
- Fresh or frozen fruits (choose any combination, including):
- Bananas
- Berries- strawberries, blueberries, raspberries
- Mango or pineapple
- Spinach or kale (for added nutrition)
- Liquid Choices: (added during blending)
- Milk (dairy or plant-based)
- Yogurt (plain or flavored)
- Fruit juice (100% juice for natural sweetness)
- Coconut water
- Protein Supplements: (optional, for added nutrition)
- Protein powder (vanilla or unflavored)
- Nut butter (peanut butter, almond butter, or cashew butter)
- Greek yogurt
- Add-ins: (optional)
- Chia seeds or flaxseeds (for omega-3s)
- Oats (for fiber)
- Honey or maple syrup (for sweetening)
Instructions:
Prepare the ingredients: If you’re using fresh fruits and vegetables, wash and chop them into bite-sized pieces. If using frozen fruits, just add to the pack.
Assemble the Packs: Portion out your fruits and vegetables into the freezer-safe bags or containers. This is based on the different smoothies that you want to make, for instance:
- 1/2 banana
- 1/2 cup mixed berries
- A handful of spinach
- 1/4 cup diced mango
If you are adding protein powder or nut butter, add a scoop or spoonful directly into the smoothie pack.
- Seal and Store: Date the bag or container with the contents and put it in the freezer. Because the packs won’t oxidize, they can be stored up to a month.
- Blend: When you are ready to make the smoothie, blend the contents of a pack into your blender, then add your choice of liquid base (about 1 cup) and any other extras you may want, such as seeds or oats and blend until smooth, adding more liquid as needed to get the right consistency.
- Pack for Lunch: Pour the smoothie into a thermos or a sealed container to take to lunch. For added fun, pop in a fun-colored straw or even a small side of granola for a crunchy topping.
Success Tips:
Personalize Flavors: Let your kids choose their favorite fruits and veggies to include in the smoothie packs. This makes them enjoy the smoothies they have helped create.
Batch Prep: Spend one day preparing multiple smoothie packs at once. This can really help streamline your morning routine and make sure your child has a variety of options throughout the week.
Frozen Fruits Add Coldness to Smoothies and Give Thicker Consistency: Frozen fruits also ensure ingredients don’t go bad because of storage.
Control Part: Take the smoothie in different packs according to the appetite of your kid. You may prepare larger packs for more active days and less packed ones for lighter days.
7. Chickpea Salad
This healthy chicken salad is a nutrient-dense and filling lunch that can deliver on both flavor and texture. Chickpeas are high in protein and fiber, so they help to provide sustained energy levels, which is great for growing kids. This is a versatile recipe with a lot of customization potential. Make it ahead of time for an easy lunch. Here’s how you make a great chickpea salad the kids will eat.
Ingredients:
- Base:
- 1 can (15 oz) chickpeas (garbanzo beans), rinsed and drained
- 1 cup diced cucumbers
- 1 cup cherry tomatoes, halved
- 1 bell pepper (any color), diced
- ½ cup red onion, finely chopped (optional)
- Herbs:
- ¼ cup fresh parsley, chopped
- ¼ cup fresh cilantro or mint, chopped (optional)
- Dressing:
- 3 tablespoons olive oil
- 1 tablespoon lemon juice (freshly squeezed)
- 1 teaspoon red wine vinegar (optional)
- 1 clove garlic, minced (optional)
- Salt and pepper to taste
- Add-Ins: (optional)
- ½ cup feta cheese, crumbled
- ½ avocado, diced
- ¼ cup olives (black or green), pitted and sliced
- ½ cup corn (fresh, canned, or frozen)
Instructions:
- Preparation of the Ingredients: Start by draining the liquid from canned chickpeas and rinse them thoroughly. Chop the vegetables and herbs as required.
- Combine the Salad: In a large bowl, combine chickpeas, cucumbers, cherry tomatoes, bell pepper, red onion, along with add-ins such as corn or olives. Toss everything together gently.
- Prepare the Dressing: Whisk all of the olive oil, lemon juice, red wine vinegar, minced garlic, salt, and pepper together in a small bowl until well mixed.
- Creamy Salad Dressing: Stir over chickpea salad, mixing all the ingredients well.
- Add Herbs and Cheese: Fold in the chopped herbs and feta cheese, if you are using any, mixing well to distribute the ingredients throughout the salad.
- Chill and Serve: Let this salad chill in the fridge for at least 30 minutes, allowing flavors to meld together. Serve over a lunch container, with perhaps adding whole grain pita bread or crackers to the side for crunch.
Success Tips
- Customizable to Taste: Let your children become a part of choosing their favorite vegetables and toppings. This way, they can make it more pleasing to their eyes to eat.
- Prepare Ahead: This is great for meal preparation since it remains fresh in the fridge for two days. Add avocado, if using, before serving to avoid oxidation resulting in browning.
- Taste Adventure: add smoky flavors to your salad by adding a pinch of cumin, paprika, or chili powder to your dressing. Switch around the herbs for one more change of pace to keep your salad fresh and interesting every time.
- Lunch Box Combination: This chickpea salad can be served in lunch with an excellent combination of whole grain crackers along with sliced vegetables or fruits for well rounded meal nutrition.
8. Bento box-style lunches
Packing a nutritious meal in a very visually appealing manner is the fun way to bento box lunch, especially for kids. Coming from Japan, the concept of bento boxes caters to different foods, thus providing a great combination with various flavors and textures to these little buddies. This type of lunch packing is not only very interesting but also pushes the kids to try different foods. Here’s how to make cute bento box lunches that will also be very healthy and yummy and appealing to children.
Ingredients
- A healthy bento box should have a mix of food groups to make it a complete meal. Here’s how you assemble one:
- Main Protein:
- Grilled chicken or turkey slices
- Hard-boiled eggs
- Tofu or tempeh
- Fish such as salmon or tuna
- Hummus or bean dip
- Whole Grains
- Brown rice or quinoa
- Whole grain pasta
- Sushi rolls (made with brown rice and veggies)
- Mini whole grain wraps or sandwiches
- Fruits
- Fresh fruit slices, like apples, pears, or oranges
- Berries, like strawberries, blueberries, or raspberries
- Grapes or melon cubes
- Dried fruits (raisins or apricots)
- Vegetables:
- Carrot sticks or baby carrots
- Cucumber slices or cherry tomatoes
- Bell pepper strips
- Steamed broccoli or snap peas
- Healthy Fats:
- Avocado slices
- Nuts or seeds (almonds, walnuts, or pumpkin seeds)
- Olive oil-based dressing or dip
- Treat or Snack:
- Small dark chocolate portion or homemade energy ball
- Yogurt or yogurt-covered raisins
Instructions:
- Choose Your Container: Opt for a bento box or a compartmentalized lunch box so that various food items are separated into different groups.That will keep the ingredients fresh as well as ensure they are presented attractively.
- Preparation of Ingredients: The protein sources and the grain may be prepared or partially precooked at home. Fruits and vegetables could be cut into manageable sizes for the kid.
- Layer the Ingredients: Put a large portion of the major protein in the bento box. Then layer on some whole grains, then fruits and vegetables. Save the final compartment of the bento to layer in those good fats and other good treats.
- Seal and Store: Properly seal the bento box so all the food inside remains fresh until lunch.
Success Tips:
Be Creative in Presentation: Stack food together, alternating different colors or even interesting shapes, for an appealing lunch. Use a cookie cutter to make fun shapes from sandwiches or fruits.
Variety and Variation: Try out new combinations and mix the ingredients for the lunches. Rotate them frequently to keep things fresh and exciting.
Meal Preparation: Prepare parts of meals a day or two before to make it convenient and fast to put together bento boxes, by cooking grains and proteins, or chopping vegetables and fruits.
Engage Children: Let the kids pick some items for their lunch. They can also help to prepare their lunch in their bento boxes. This would likely help them feel invested in the process and maybe even in healthy foods as well.
9. Pasta Salad
This pasta salad is one of the best multifaceted and delicious school lunch ideas, and great for kids who love variety in flavors and textures. Combining colorful vegetables, whole grain pasta, and tasty dressing, all these can be prepared ahead, served cold, and amazing for those busy mornings when there’s no time to make anything else. Here’s what you could do to have a very nutritious and lovely-looking pasta salad that will keep the kids going all day.
Ingredients:
- Pasta:
- 2 cups whole grain pasta ( rotini, penne, or farfalle works well)
- Veggie Options
- Cherry Tomatoes
- 1 cup halved cherry tomatoes
- Cucumbers
- 1 cup diced cucumbers
- Bell Peppers
- 1 bell pepper of any color, diced
- Sweet Corn
- ½ cup fresh, canned, or frozen
- Carrots
- ½ cup shredded
- Olives
- Black Olives or Kalamata Olives can be used. This is optional.
- Protein Options
- 1 cup diced cooked chicken or turkey
- 1 cup canned chickpeas, drained and rinsed
- ½ cup cubed cheese (mozzarella, cheddar, or feta)
- Dressing
- ¼ cup olive oil
- 2 tbsp red wine or apple cider vinegar
- 1 teaspoon Dijon mustard
- 1 clove garlic, minced (optional)
- Salt and pepper, to taste
- 1 teaspoon dried oregano or Italian seasoning
Instructions for Assembling a Bento Box:
- Cook the Pasta: Bring salted water to a boil in a large pot. Boil whole grain pasta according to the package directions until al dente. Drain and rinse with cold water to cool.
- Prep Vegetables: While pasta is cooking, wash and chop veggies into bite-sized pieces. If you are using proteins like chicken or chickpeas get those ready as well.
- Toss Salad: Combine cooked pasta with any vegetables and proteins or cheese you are using and gently toss them.
- Prep the Dressing: Whisk together olive oil, vinegar, Dijon mustard, minced garlic, salt, pepper, and dried oregano or Italian seasoning until well combined.
- Combine Dressing and Salad: Pour over pasta salad and gently toss to distribute all ingredients.
- Chill and serve: Chill 30 min in refrigerator for flavors to meld. In bowls, chill over a bed of mixed greens; serve with whole grain crackers and/or fruit on the side for a very healthy lunch.
Suggestions for Success:
- Personalize Ingredients: Pasta salad is a very customisable recipe. Encourage the kids to take an active part in picking their favorite vegetables and proteins and help make the salad end.
- Leftovers: Another great resource for leftover meats or veggies cooked the other day, which is highly helpful in meal preparation.
- Add some colors and flavor: Add a variety of colorful vegetables to make the salad interesting and nutritious-looking
- Make it fun: Use fun-shaped pasta or add colorful cherry tomatoes to make it interesting-looking for kids.
10. Homemade Pizza Slices
Homemade pizza slices are a fun and customizable lunch option kids enjoy! It can be made with various toppings and ingredients, which would seem to be creative but ensures a balanced meal. Making pizza at home saves money and gives an opportunity to determine what goes into the pizza, making it healthier compared to store-bought. Here is how you can make delicious homemade pizza slices for lunch boxes.
Ingredients:
- For the Pizza Dough:
- 2 cups whole wheat flour (all-purpose flour works too)
- 1 packet (2 ¼ teaspoons) active dry yeast
- ¾ cup warm water (around 110°F/43°C)
- 1 teaspoon sugar
- 1 teaspoon salt
- 1 tablespoon olive oil
- For the Toppings:
- 1 cup pizza sauce available in stores or make your own
- 1-2 cups shredded cheese (mozzarella, cheddar, or any mix)
- Toppings: Take your pick of:
- Pepperoni slices
- Cooked sausage
- Diced bell peppers
- Sliced mushrooms
- Spinach or kale
- Pineapple chunks
- Olives
Instructions
- Make Dough:
In a small bowl mix the warm water, sugar, and yeast. Let it sit for 5-10 minutes till it is frothy.
Combine flour and salt in a large bowl. Make a well in the center. Add yeast mixture and olive oil.
Mix until it comes together into a dough. Knead on a floured surface for about 5-7 minutes till smooth and elastic.
- Let the Dough Rise:
Shape the kneaded dough into a lightly oiled bowl. Then, cover it with a wet cloth, and then move it in a warm place to rise for about an hour, or till it is doubled in size.
- Preparing the Oven
Preheat your oven to 475°F (245°C). Put a pizza stone or baking sheet inside and let it get hot. Forming the Pizza :
Once your dough has risen, punch it down and roll out the dough on a floured surface to a crust that you like-thin or thick.
Move the rolled-out dough to parchment paper or a floured pizza peel so it’ll be easy to move over to the oven.
- Add Sauce and Toppings:.
Sprinkle shredded cheese and toppings of your choice over the sauce.
- Baking the Pizza:
Carefully move your pizza to a preheated pizza stone or baking sheet. Bake for about 10-15 minutes or until the cheese is melted, bubbly, and the crust turns golden brown.
- Cool and Slice:
Let it cool for a few minutes after baking. Using your pizza cutter, you can cut it into wedges or squares.
- Pack for Lunch:
Place the pizza slices into the lunch box. Provide fresh fruit or raw vegetables on the side to make it a full meal.
Tips for Success:
- Engage kids in the pizza-making process by allowing them to pick the toppings they like, so they get the idea of being owners over their meal.
- Feel free to experiment with new flavor combinations. This can be through barbecue sauce or pesto as sauces or using different cheeses.
- Make dough ahead of time and store portions in the freezer for an easy lunch later. Bake some extra pizza and freeze some slices ahead of time, also.
- Keep Warm: If you want your pizza slices to stay warm until lunch time, place the pizzas in an insulated lunch container or a thermos.
Conclusion
With the back-to-school season just around the corner, it’s time for healthy lunch options for kids to make them grow, energized, and healthy. Think colorful wraps, wholesome grain bowls, DIY lunchables, and slices of fresh homemade pizzas-out of so many creative, healthy lunch options kids are going to love lunchtime. This would give them an interest in preparation and enable them to point to their favorite ingredients for usage, thereby much more putting the parent to foster healthy eating habits and an optimistic attitude towards food. All these healthy lunch ideas would make sure the kids have all the nutrients they need to attend school, stay focused, and satisfied with what they have at school time, which would set them ready for better learning and other activities. Indeed, all it takes is a little planning and thinking to turn healthy packing and balancing into a delightful routine for both mothers and children.
FAQs on Going Back to School: Healthy Lunch Ideas for Kids
1. Why is a healthy lunch for a child necessary?
Balanced nutrition at lunch is one of the main diet factors for the children’s overall health improvement, growth, and intellectual functions. A well-balanced diet will thus ensure that the children get exactly the right amount of nutrition, for proper development, with a boost in energy, and they can learn and concentrate properly in school. Nutrition will, in turn, enable them to lead healthy eating habits throughout their lives and stay fit, so they do not suffer from obesity or other chronic diseases.
2. What are some of the major components of a nutritious school lunch?
What should nutritious school lunch consist of?
- Fruits and Vegetables: Fresh or dried fruits and other colorful vegetables supply essential vitamins, minerals, and fiber.
- Whole Grains: Foods like whole grain bread, brown rice, or whole grain pasta sustain energy and provide nutrients.
- Protein: Offers includes lean meats, beans, legumes, dairy, and plant-based proteins that aid growth and muscle building.
- Healthy Fats: In the form of nuts, seeds, avocado, or olive oil, these provide brain functioning along with replete the body with feeling fuller longer.
- Hydration: Hydrate with water or lower sugar drinks.
3. How can I get my child interested in eating lunch?
Getting your child involved in the making of his or her lunch is a great way to get them excited about eating it. Here are a few ways to do so:
- Grocery Shopping: Have them assist in selecting fruits, vegetables, and snack time.
- Prep of Lunch: Have them assist in preparing, washing, or assembling their lunch.
- Create Personalisation: Encourage that child to create his own item using whatever contents in their wraps or bento box create for that exciting lunchtime experience
4. Prep-ahead-of-time lunch ideas?
Most lunch ideas lend themselves toward prep-ahead-of-time, including:
- Wraps and Sandwiches: Prepare them the night before and refrigerate till lunchtime.
- Pasta Salads: Prepare one large batch on the weekend and use that week for lunches.
- Smoothie Packs: Put together ingredients and freeze so kids can grab them in the a.m. and blend.
- Bento Boxes: Prepare different elements (proteins, vegetables, grains) ahead of time for the kids to mix and match.
5. How do I make healthy lunches more appealing to kids?
To Make Healthy Lunches More Appealing:
- Add Colour: Incorporate a multicolored mix of fruits and veggies.
- Creative Presentation: Make it attractive by piling food in shape or pattern, making sandwich fun-shaped using cookie cutters
- Pack dips: Pack healthy dips such as hummus or yogurt with vegetables and fruits
- Make it interactive: Pack items that can be assembled or built, for instance DIY Lunchable or wraps.
6. What can replace common allergens found in school lunches?
If your child has a food allergy think about that
- Nut Allergies: Swap the seed butter with sunflower seed butter or pumpkin seed butter. Use soy or coconut-based spreads.
- Dairy Allergies: Use plant-based milk, yogurt, or cheese alternatives made from nuts or soy.
- Gluten Sensitivities: Use gluten-free grains, like quinoa, rice, or gluten-free pasta.
7. How do I keep my kid’s lunch fresh until lunchtime?
What to do to pack lunches fresh:
- Use Insulated Containers: Insulated lunch boxes or thermoses help to keep the food at the right temperature.
- Freeze Items: Sandwiches or wraps freeze overnight; they’ll be thawed when lunch time comes.
- Cool Packs: Add some ice packs to a lunchbox to chill perishable items.
8. What should NOT be packed in school lunch preparation?
Things Not to Do in Preparing School Lunch
- Avoid the following when preparing school lunches:
- Highly Processed Foods: These contain high levels of sugar, sodium, and harmful fats, which may lower one’s energy and poor nutrition
- Too Many Sugary Snacks: The alternative would be to fruit or nuts or yogurt rather than candy or cookies.
- Single Food Groups: Ensure proteins, carbs, and fats in that meal instead of just one food.
9. How can I modify lunch for finicky eaters?
Tips for the finicky eaters
- Gradual Introductions: Introduce new foods along with their favorite to make it easy for them to begin trying new flavors
- Engage Their Taste Buds: Mix and match numerous textures, colors to pique their interest.
- Be Patient: Encourage them to try a small bite with no pressure, and cheer on their willingness to experiment.
10. What are some budget-friendly lunch ideas?
Budget-friendly lunch ideas are:
- Making Lunchables: Use whole-grain crackers, cheese, and deli meats or veggies.
- Making soups: Making big batches of soups or stews that freeze well and can be divided up later.
- Rice and Beans: These are cheap, filling, and bursting with protein when paired together.
- Seasonal Fruits and Vegetables: Use seasonal produce to save you money while offering healthy choices.